Basic PIC16 hardware setup
Your basic PIC16 microcontroller can’t hold down the fort by itself, it needs a little help from a few components.
I use a prototyping breadboard, the white kind you can just plug & unplug stuff to all day long. It makes life prototyping a whole lot easier.
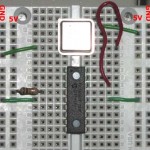
Ok, now on to the PIC stuff. First and foremost, you need an oscillator, the oscillator is what keeps the PIC moving, it provides the clock signal for the chip. For our 16F628, I used a 20MHz oscillator in a “half-can” package. Many people like to use crystals and capacitors, etc, I use them on simpler designs, but they’re a bit harder to understand at first.
These oscillators are powered by +5V, and the output goes into the pin labeled OSC1/CLKIN on the 16F628. You can get these oscillators at Digi-Key (part#: CTX169-ND).
The other key part is the reset line. We need to hold this line HIGH (+5V) and drop to it 0V to reset the chip, which we won’t need for a while. To tie it high you use a “pull-up” resistor (10k is good for this) to the +5V line, connected to the _MCLR pin of the chip (reset pin). I like to use the outside rails for Ground, and inside rails for +5V as you’ll see in the pictures… This isn’t *required* as our chip is smart enough to pull up it’s own _MCLR pin, but for the first few projects we’ll explicitly do it so you get used to it. 
Also connect Vss and Vdd to Gnd and +5 respectively to power the PIC.
After wiring these parts up, your breadboard should look something like this:
We also need a power supply. I use an old AT power supply, taking the red and black lines for +5 and Gnd respectively. You can use a 5V bench supply, batteries, wall-wart, anything 5V (but make sure it’s regulated).
Another smart part to use is a bypass capacitor, this lets the PIC draw power from the cap instead of the power supply during an increased power draw time, these are usually brief, but the power is needed quickly and a voltage drop would be bad, so you place a small, fast capacitor nearby the IC to provide the instant power and keep everyone happy. Typical values are a .1uF Tantalum capacitor.
Also handy are a pair of IC chip pullers, available in most little toolkits, they’ll help you avoid damaging the chip as you pull it out of the breadboard…


